| Nancy Kroes' Scotty 2, a 1969 13' Gaucho Rebuild
This
Scotty was purchased on Ebay in late June, 2004.
I bought this Scotty with
the intention of fixing her and reselling her, but when I actually
got her home and started looking at her, realized to do the job
right, she needed a total rebuild. I decided to rebuild her as
a birchwood beauty and keep her for myself.
I sold her in 2008, after I bought a Rear Door Scotty.
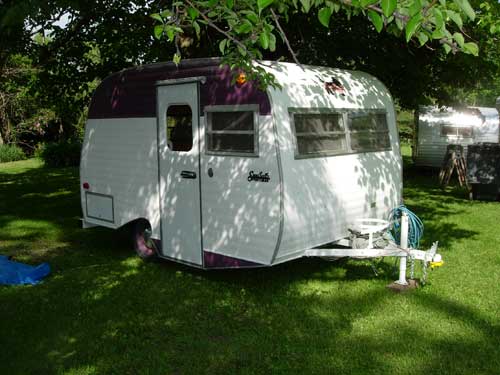
Her Ebay photo
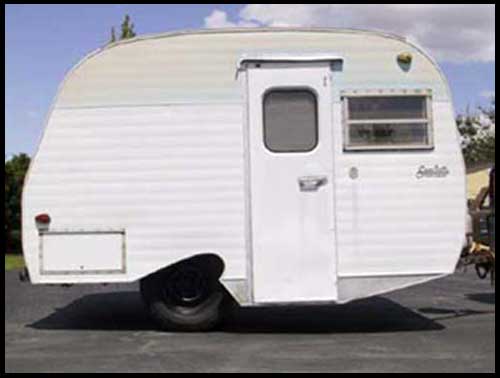
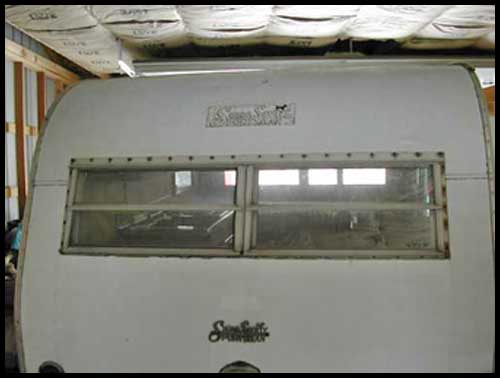
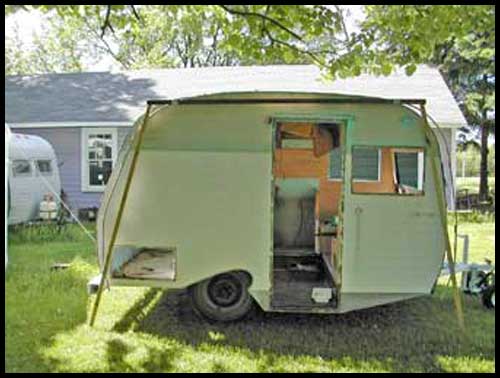
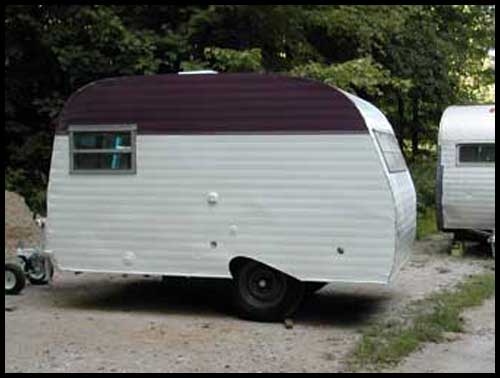
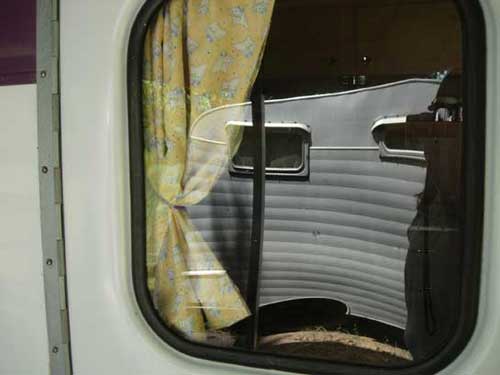
This
is Scotty 2 from the right side.
There is barely any of the
aqua paint left.
Her windows are all present and working, as
are her screens.
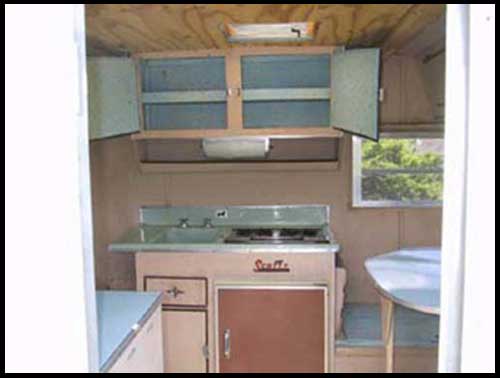
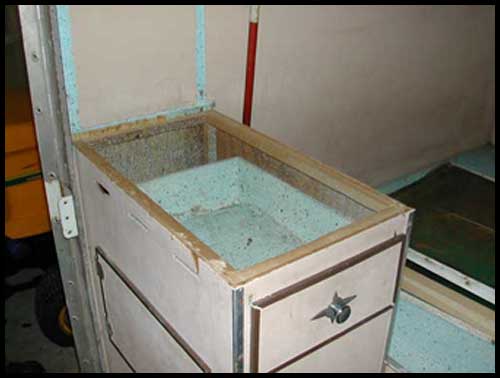
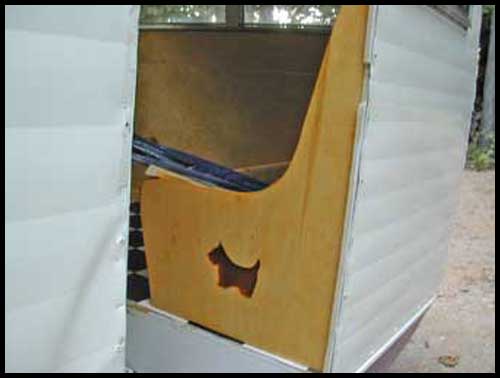
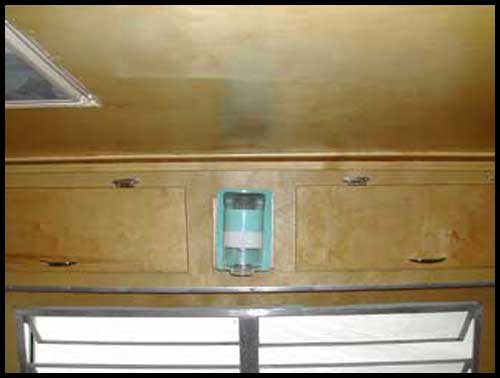
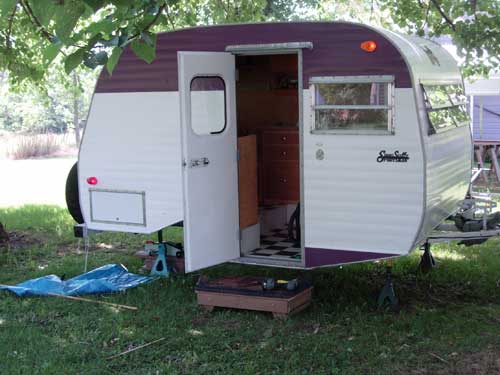
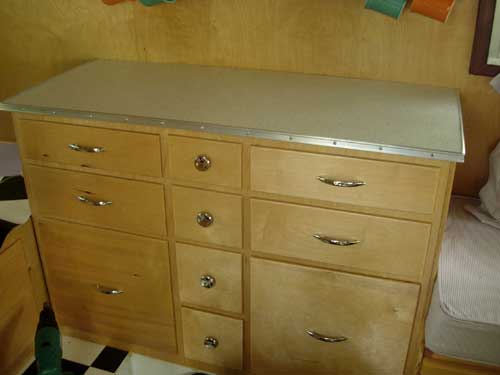
This
is her kitchen as I received her.
Note the original table top
and the countertop to the left of the door.
These are the items
that the buyer of Scotty 1 requested and I gave to him.

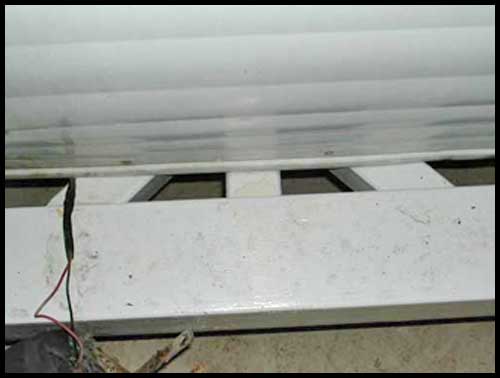
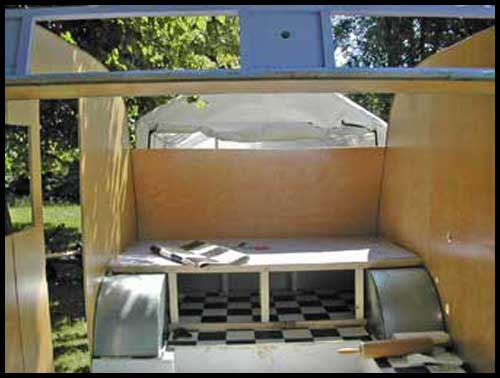
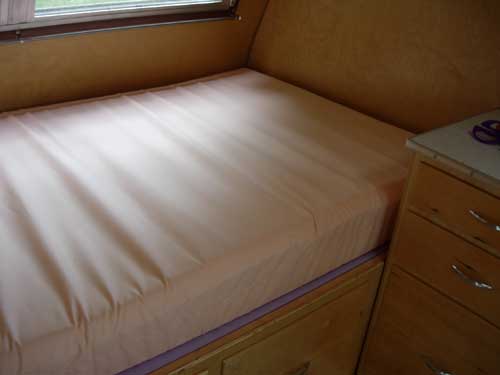
This
is the couch area. This Scotty came with no cushions.
Note
the vent under the couch. It will be replaced with drawers.
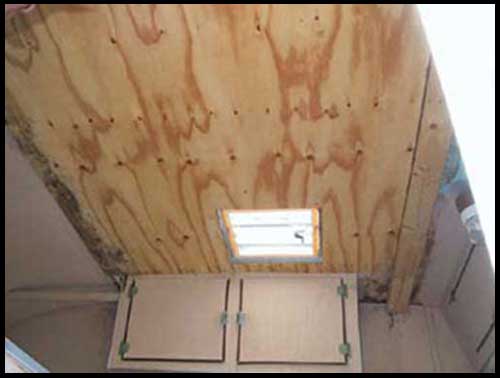
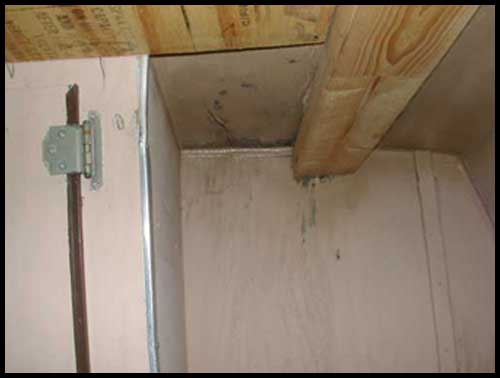
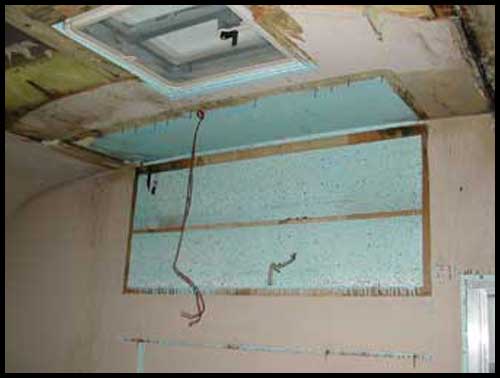
This
is the ceiling as I received her.
From the signs of the roof
above, multiple layers of what appears to be bondo,
and the
ceiling below, there has been some pretty serious leaking.
She has the optional propane light but does
not have (any longer) the 12v ceiling light.
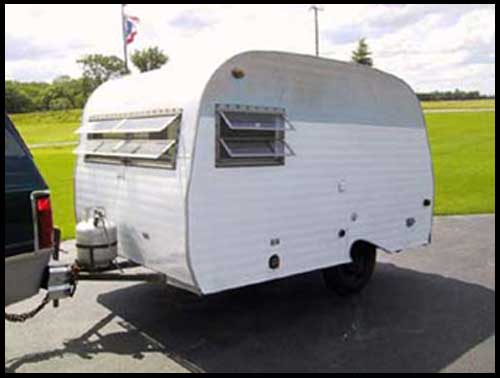
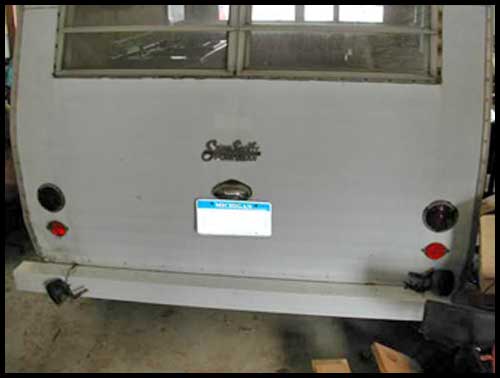
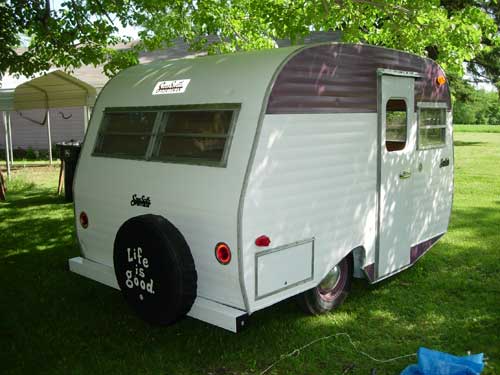
This
is how she looks from the back.
Her original decals, both front
and rear, are extremely faded and I purchased
brand new
decals that were manufactured to the original specs.

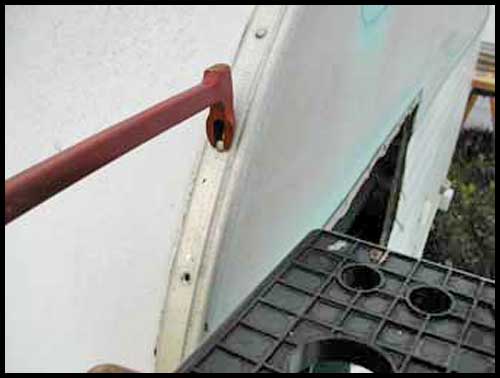
And,
from the front. I replaced the tongue jack, the
coupler, and the safety chains. Her jack broke when I was picking
her up in Columbus and after I'd towed her 300+ miles home,
I discovered that the innards to her coupler were missing completely!
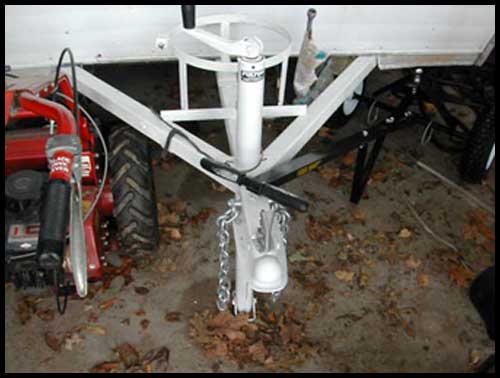
The
new jack and coupler. I replaced her original 1 7/8" coupler
with a 2" one.
It is kind of hard to find a 2" coupler that
fits a 2" hitch. Most places carry only ones for 2 1/2" or
3" hitches. I found and ordered this one online from Northern
Tool.
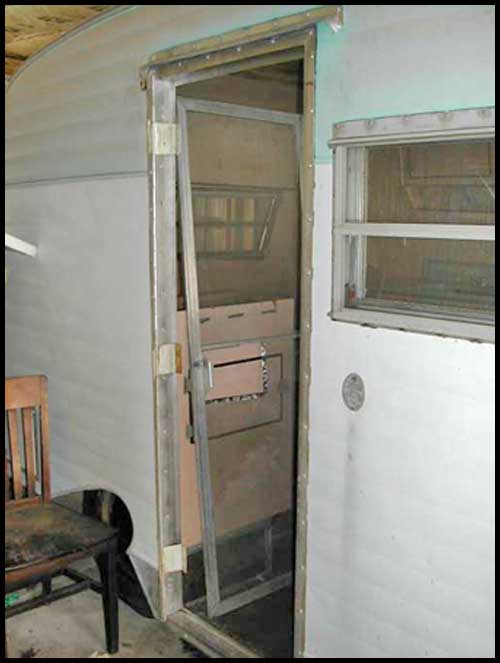
Her
original door was almost like closing aluminum foil. I removed it and am
in the process of rebuilding
it.
She came with a screen door,
but like many of the Scotty screen
doors, it was missing the slider.
I will be building her a
new wooden screen door which will be more in tune
with her
new wooden (not painted) interior!
My
cousin took the bumper off a trashed Shasta trailer and modified
it
for use on this Scotty. One of the additions will be a spare
tire mount.
This Scotty has all of her lights, but a previous
owner had clipped all the wiring
to them and installed a set
of add-on lights. I have since removed all the Arrow marker
lights and bought brand new ones. I will hope that new wiring
will bring the original Yankee TurnFlex taillights back to
life as they can not, at this time, be obtained.
My
cousin did an excellent job mounting this bumper.
He fabricated
from scratch this 3-way mount.

Nate
bolted the bumper on from underneath.
The bumper mount fits
over the steel channel already under the Scotty.

A
closeup of the original license plate light and holder.
The innards were toast but my dad reworked it with new parts.
The
cabinet to the left of the door. As previously noted,
I gave
its original top to the buyer of Scotty 1.
This Scotty did not come with the optional
furnace.
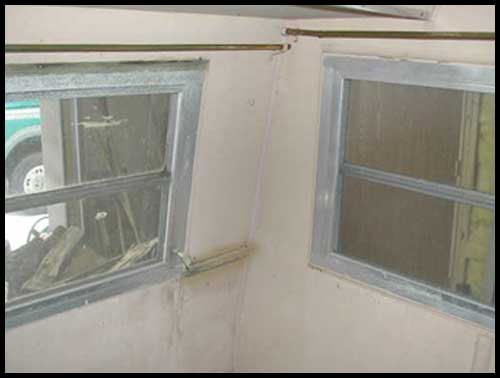
The
dinette walls as I received her.
Does not look like there has
ever been any serious leakage here.
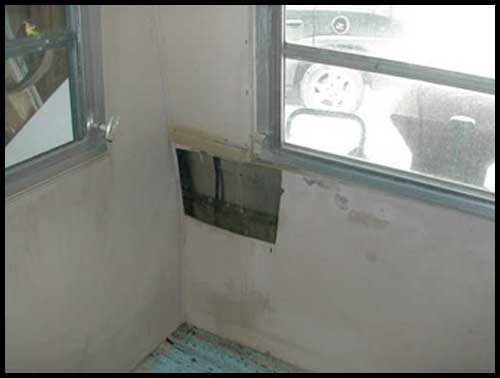
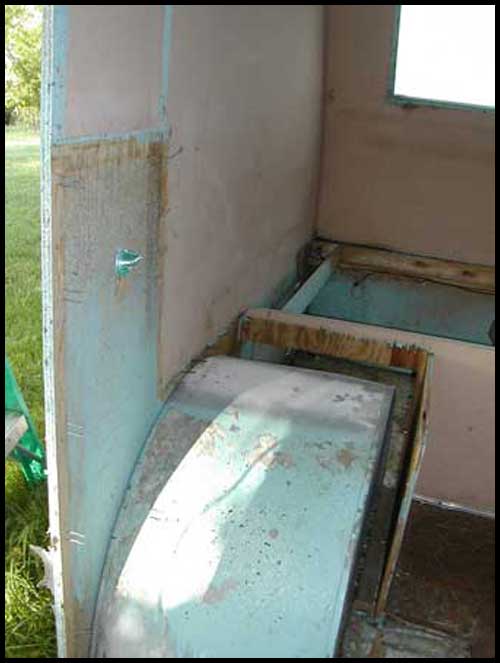
A
picture of the left side of the dinette area.
I do not know
why the hole was cut there. The propane line is visible.
Perhaps
not a good sign! All of the window cranks in this Scotty are
broken off. It appears to be intentional. I will remove them
and see if I can sand the broken edges smooth. I actually like
that they are not as long as they were originally.
This
shows the very shoddy job done to replace the ceiling.
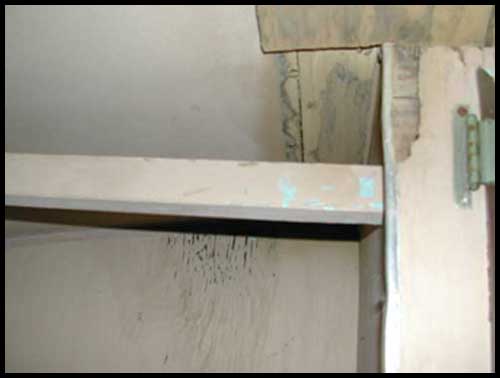
Major
signs of water damage here—even the cabinet itself has
started to rot! This Scotty has what appears to be a closet
pole installed here. I thought it was
a previous owner enhancement but have seen the exact item in
other Scottys so believe it is original. I will be removing
it as I plan a bookshelf in this area instead.
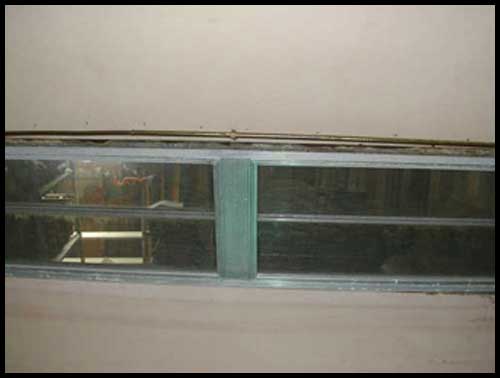
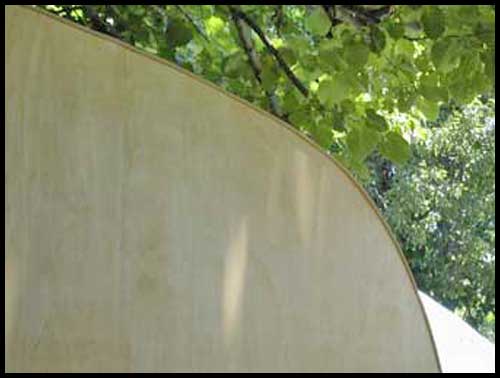
The
back window. The upper trim is completely rotted.
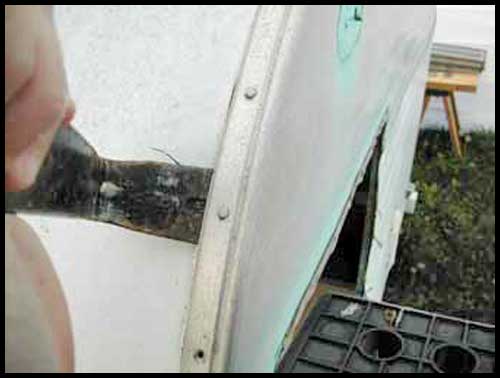
Removing the strips.
This is the second Scotty I've removed a strip from so I am being very careful
with this one. Using a flat pry bar to carefully pry up so I can get under the nail head.
Now using a cat's paw pry bar to remove the nail.
My roof seams. That black tarry goop. Ick.
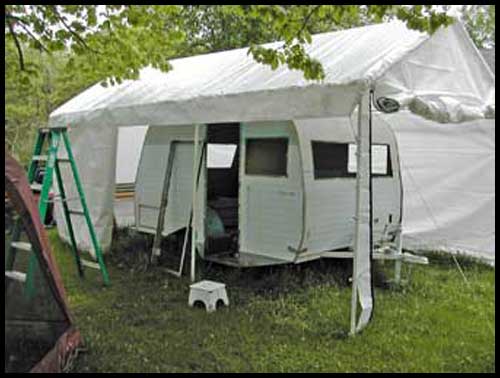
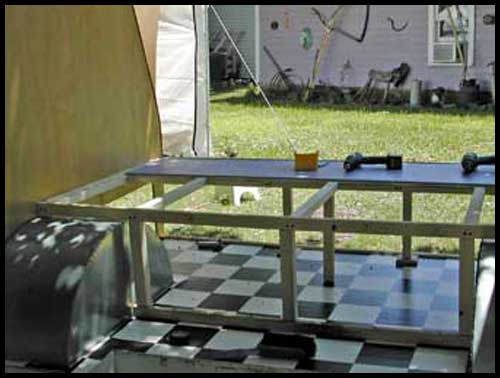
Set up a shelter in the yard. This project is going to take a long time.

Her windows. Note the really bad staining from the original screws.
Stainless steel screws will be used when I replace the windows!
Cabinet to the left of the door has been removed.
If you look carefully you will see the numerous very large staples that had been
used through the wall from the outside to hold it in place. Glad I was not planning on reusing this cabinet. It came out in pieces because of all those staples
The upper kitchenette cabinet has been removed.
Look at all the nails that came down into it from the ceiling!
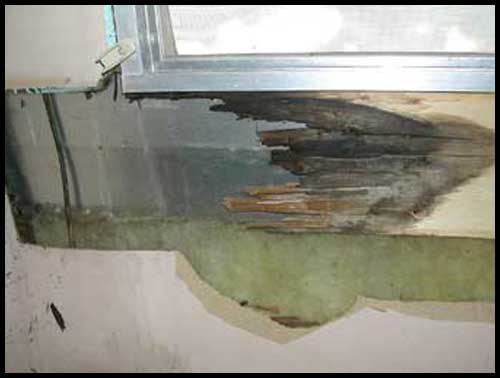
Okay, now I see why that hole had been cut in the dinette. Look, about 18"
of the support piece under the front window is completely rotted away!
Door frame removed.
There is nothing wooden left under it--it is completely rotted away!
The framing around the roof vent was fine.
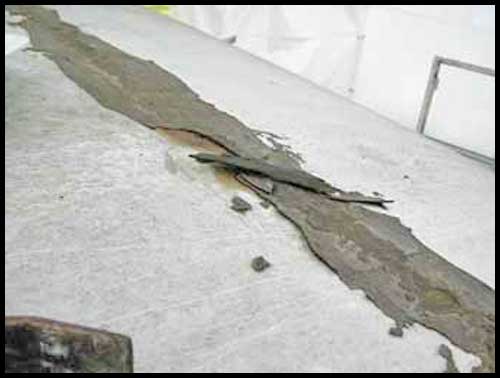
The framing under the roof seams is completely rotted away.
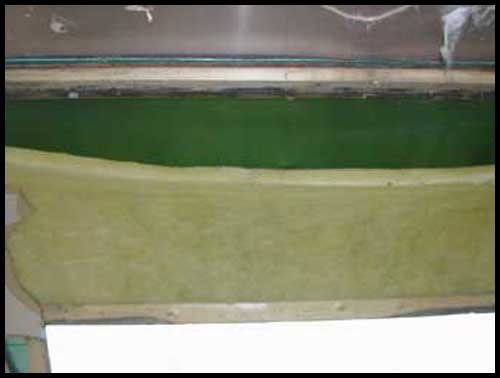
Just showing what is between the inner ceiling and the outer skin--1/2" of
fiberglass and nothing else!
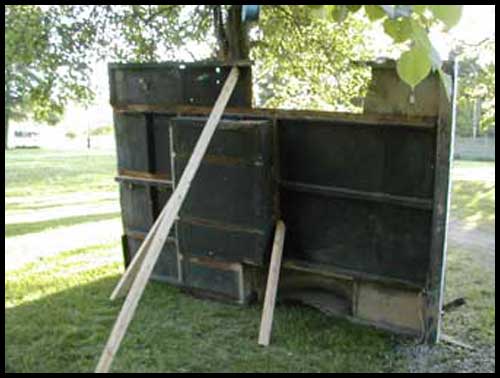
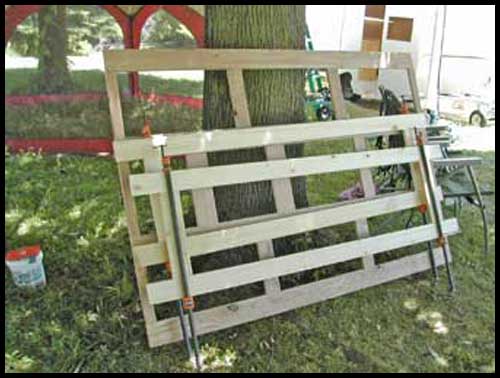
The framework I made to attach my edge strips as I removed them so they
would not twist and distort themselves! Just going to lean them up against
the garage until I'm ready to reinstall them.
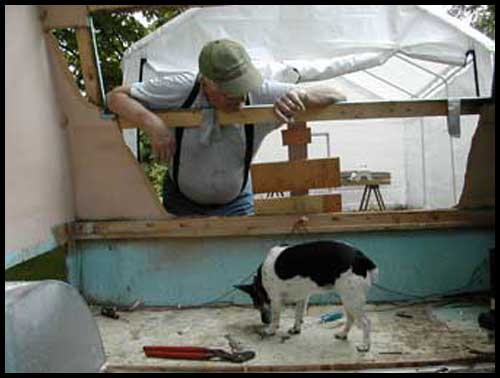
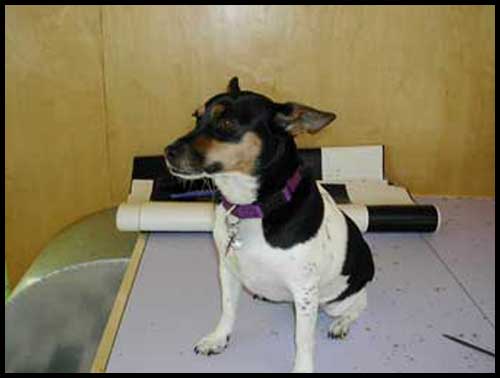
Mabel and her grandpa doing an inspection.

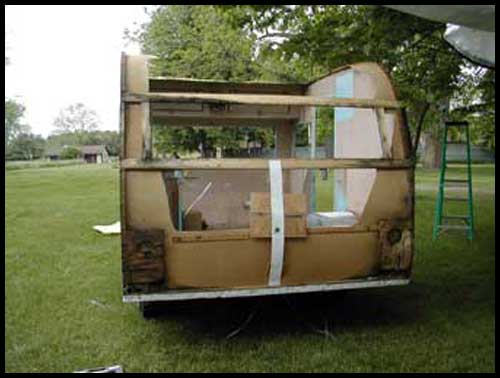
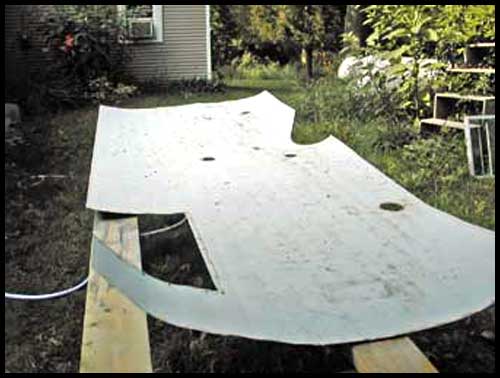
Skin is all removed. It doesn't look too bad in this picture but the 2"
around all the edges is rotted beyond any stability being left.

And, a view of the other side.
A view from the back - not much structure found here!
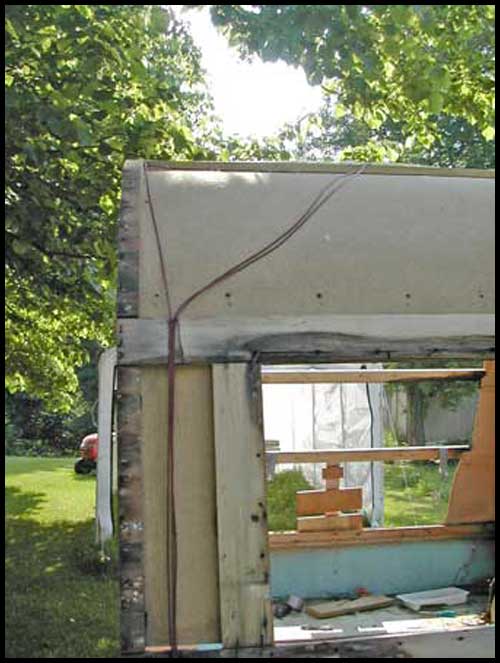
And, from the front - that's the wiring for the marker lights and
the original 12 volt light that was no longer in her.

A close up of the wiring

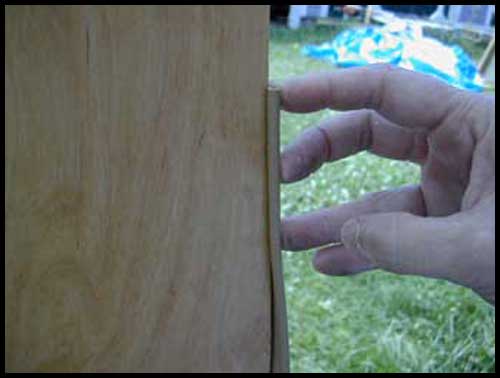
This is a good view showing how the Scotty was constructed.
1/2" plywood for the sides and then 3 pieces of 1/4" plywood, 1 1/2" wide,
was laminated and stapled to the edge of the 1/2" plywood giving some semblance of "solid" wood to attach the roof!

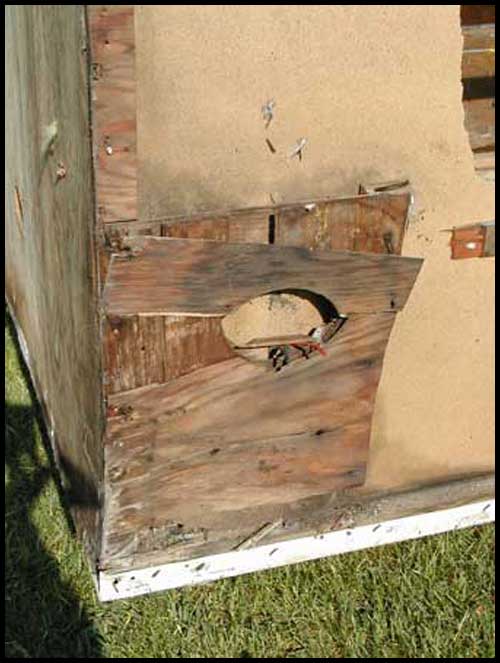
The wheel cutout--that aluminum you see there is the wheel well.
You can also see how Serro attached the 3 sheets of plywood together
for the sides.
And this is where the 120 electrical ran for the light
under the upper kitchenette cabinet.
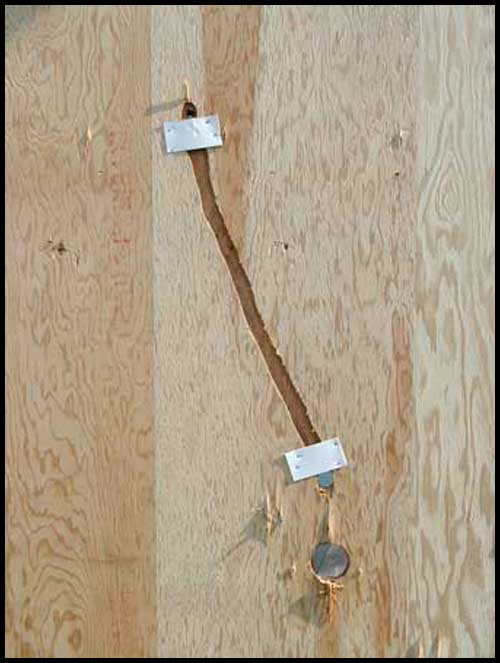
This is how the taillights were attached.
A cheesy piece of plywood was stapled to the edge of the side.
Its pretty much rotted away.
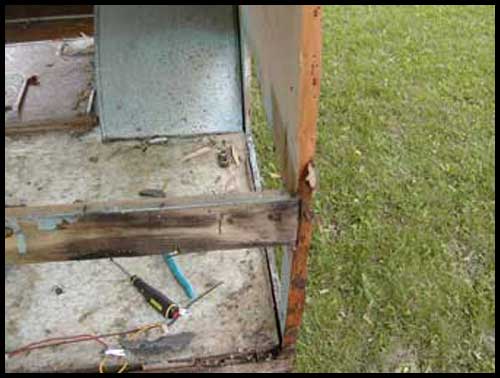
More construction details, on the back end.

This pneumatic cut off tool came in very handy for cutting through screws
and staples that could not be removed. I had to use it to cut slots in most
of the square drive screws holding the awning strip down and several of the screws holding the windows and door frame on.

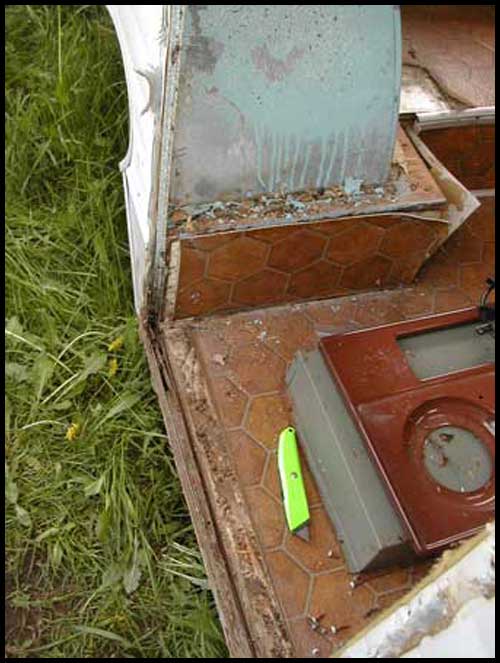
All that's left of the original Scotty. Now the real fun begins.
Mabel is saying "where'd it go?"

The wheel well. Lots more of those very large staples used here too!
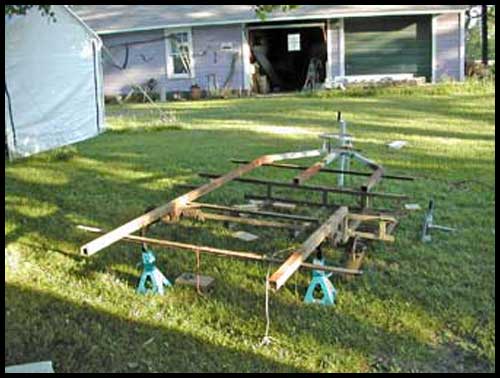
Down to the bare frame, at last!
Keeping the original floor around for measurements.

The frame has been power wire brushed, primed and recoated
with a spray on truck bed liner.
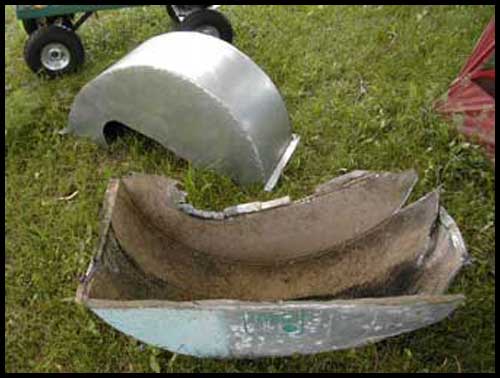
One of my wheel wells was damaged beyond repair and I had my very handy cousin
(of bumper fame) make me a new one. Because the original was only 28 gauge galvanized and the new ones are 24 gauge and much sturdier, I opted to have
Nate build me a new one for the other side, even though there was nothing
wrong with that original one. The insides of the new ones were liberally
coated with the spray on truck bed liner.
Using biscuits and Titebond III (water proof) glue to assemble all my plywood
panels. I used 9/16" exterior glued plywood for the floor, instead of the original 1/2".
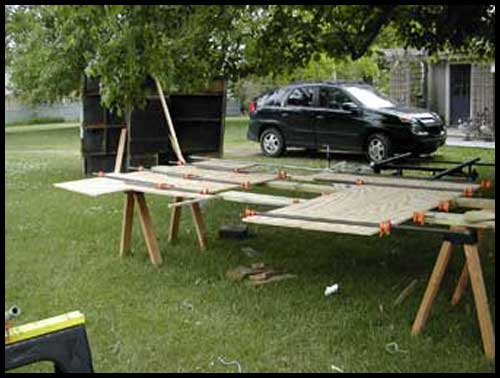
The new floor all clamped and glued.
It is true that you can never have too many clamps!

Just making sure the new floor fits on the frame. And, whew, it does!
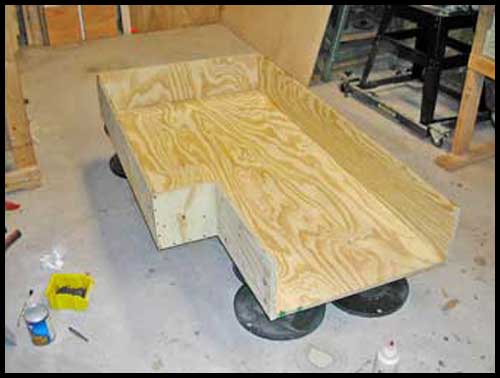
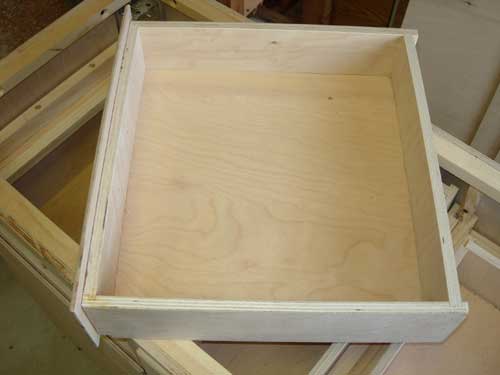
And while the new floor was being assembled outside, the new dropdown
was assembled in the shop. It is all put together with screws and Titebond III
glue. No staples used here!
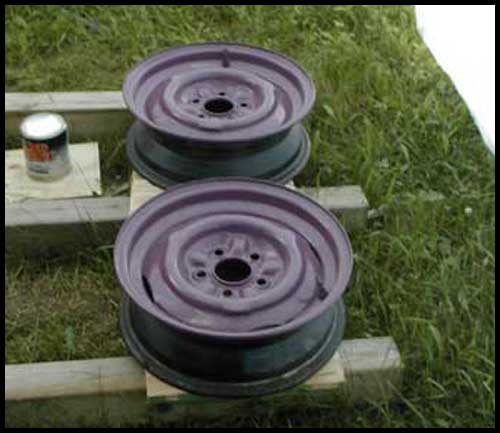
And, painted the wheels with the new color matched
(to the new awning) purple paint!

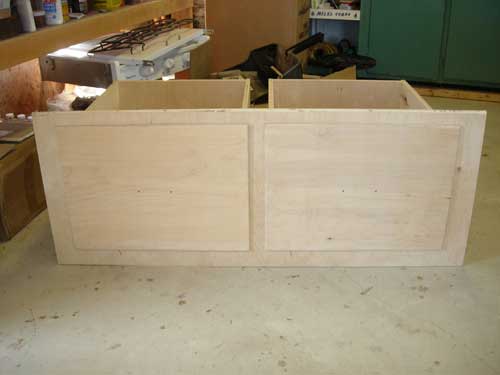
The drop down is attached (screws and glue) to the floor, and all
the 2x2 and 1x2 structural framing is added.
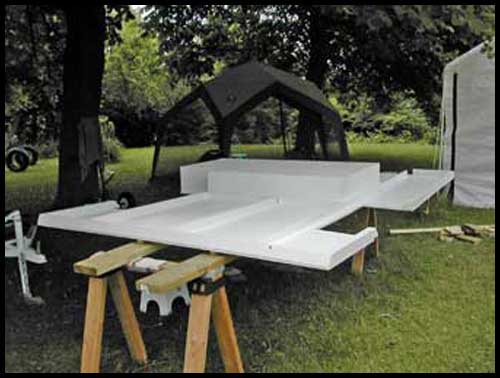
Two coats of white extreme weather exterior enamel goes on now.
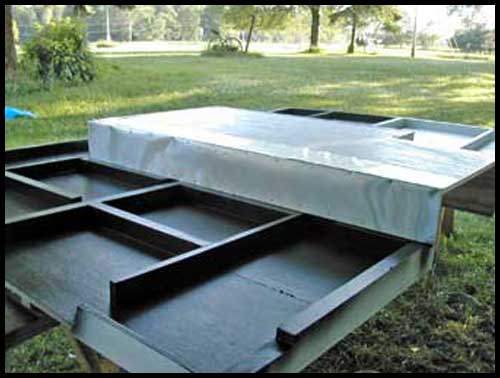
And, aluminum flashing material is added along the edges of the drop down
and the entire floor gets sprayed with truck bed liner.
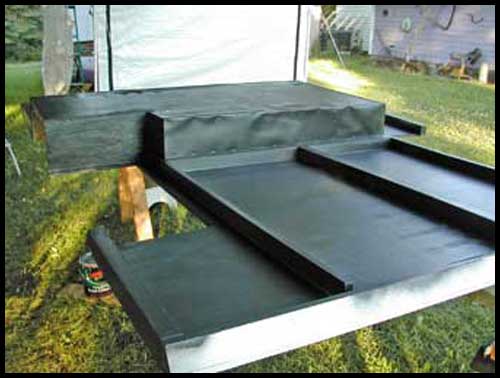
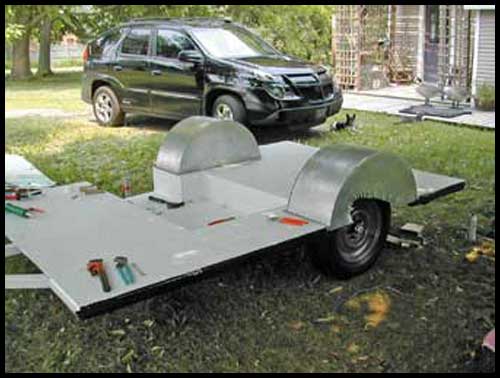
All finished and ready to flip over and install on the frame!
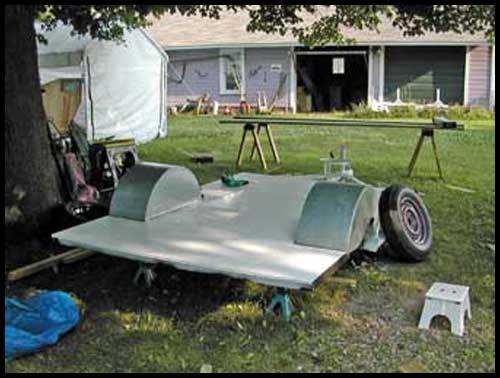
On the frame and the top side of the floor has now received two coats of
the white paint. New wheel wells are also installed.
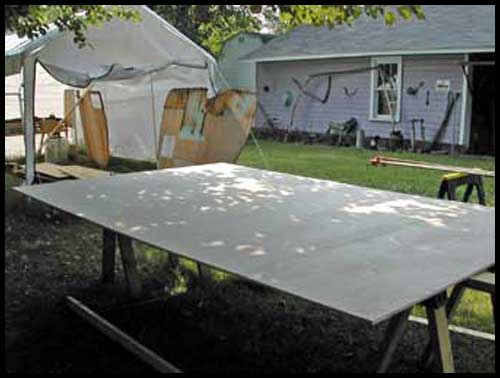
Two and a half sheets of 1/2" birch are biscuited and glued together for the first side.

Used the original side as a pattern to trace onto the new birch.
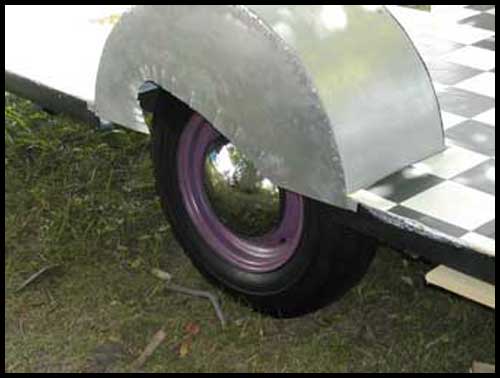
Oooh. Look at the new purple wheels with the Baby Moon hubcaps I got on Ebay!
For the record, 10 1/4" hub caps fit on the original Scotty wheels. 10 1/8", which are way easier to find, are too small and will just pop right off.
She's all ready to install the new flooring!
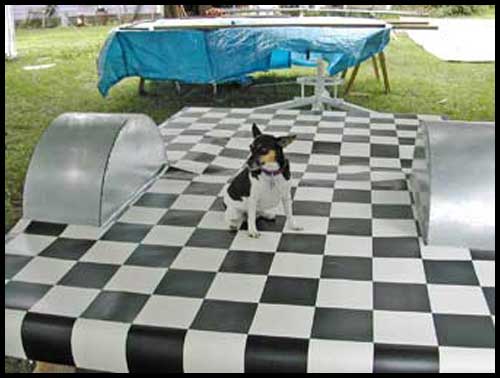
And look how nice Mabel looks on the new black and white checked floor!
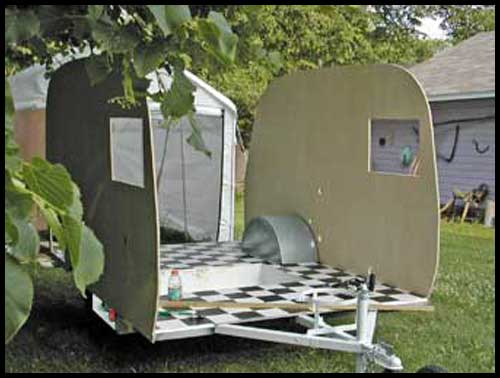
The new birch sides have been installed.
They were screwed into the 2x2 framing along the edge of the floor.
No glue (or staples!) used here.
The outside of each wall received two coats of the white paint.
The interior walls have been stained with a mixture of 10 parts golden oak
and 1 part cherry Watco Danish oil and have received two coats of satin finish
quick dry Polyurethane.
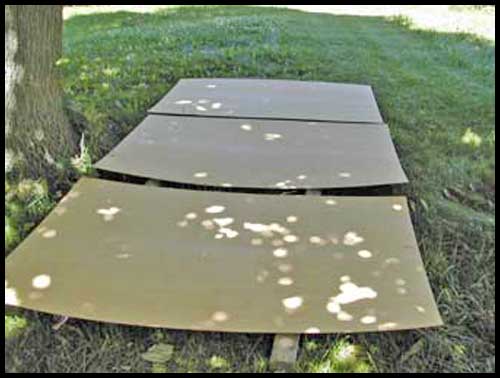
This is 3 of the 5 sheets of the 1/8" birch that will become the ends and ceiling.
Pre-staining and pre-polyurethaning it before it goes on.
This is automotive welting. It transitions the walls to the ceiling/ends.
I found that "Buckskin" color worked well.
Welting installed--it was just stapled on using 1/2" staples with a 1/4" crown.
The bed frame is installed.
I am turning this into a mattress model and making it a full-time twin sized bed.
Installed the front cabinet before putting on the ceiling.
Mabel likes that the new bed is lavender--her favorite colors: purple and lavender!
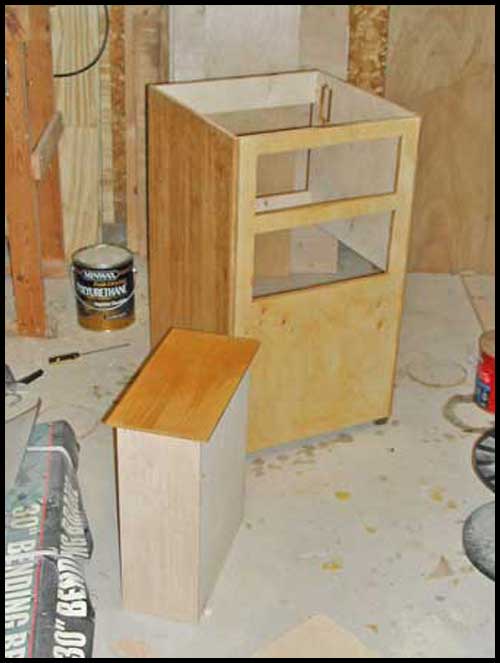
The new cabinet that goes to the left of the door.
I made it so it does NOT hang over into the drop down and its wider than the
original. I had space enough for two very nice sized drawers--it will be
much better use of space than the original cabinet!

I reused the original front cabinet but faced it with 1/8" birch.
The interior was painted lavender.
The aqua Humphrey light is NOS that I found on Ebay.
Much prettier than the original brown/coppertone one.

Ends/ceiling installed. This shows the welting transition.

Front cabinet installed and the new ceiling

My dad came down to pull staples from the skin.
Bless him, it was a very time consuming job. The staples were very rusted into the alumimum but he took an old very thin bladed screw driver and filed it to a
sharp point and used it to pry them out.
After the staples were removed, I had a lot of serious scrubbing to do!

Cleaned pieces of skin, waiting to go back on.
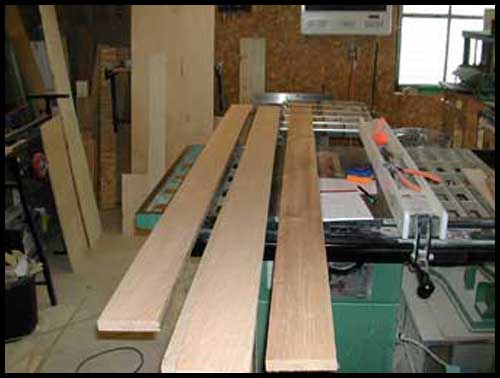
Solid oak out of my 1000 board foot stash. Already planed (thanks Dad!)
and ready to be mortised and tenoned and turned into roof support structure.

Skipping a lot of boring stuff here, the finished product,
glued (Titebond III) and clamped up. This is all oak.
Go here if you want to see mortice and tenons being made.
And, the front and back window supports, mortised and tenoned and glued up,
but pine, not oak.
Roof support is on. The windows will be cut out later.
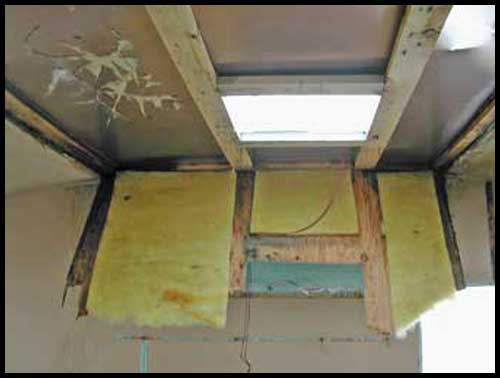
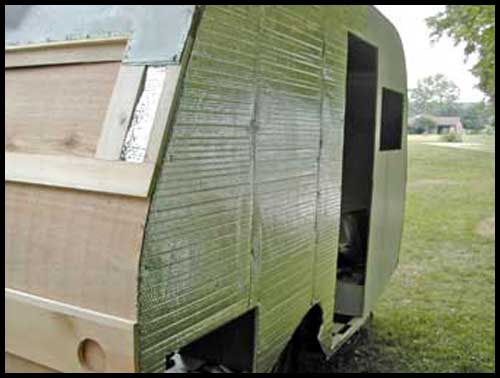
Window supports in place. Using TekFoil, foil- bubble-foil, as "insulation".
It will reflect heat out in the summer and keep the inside cool and reflect heat in,
if I'm heating the inside and keep it warm.

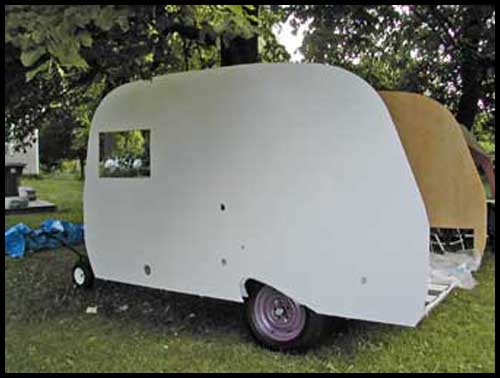
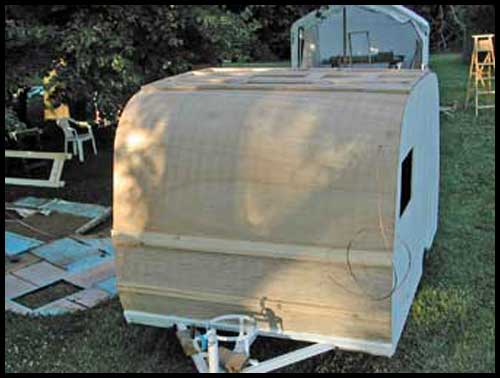
Front skin is attached.

Roof skin is on. I used my heat gun to warm up the tarry goop and it scraped
right off using a putty knife. I then power wire brushed what remained.
There is a stain left, but nothing to worry about.

Putty tape between the seams and all screwed down using
1/2" stainless steel screws and washers from McFeeley's!
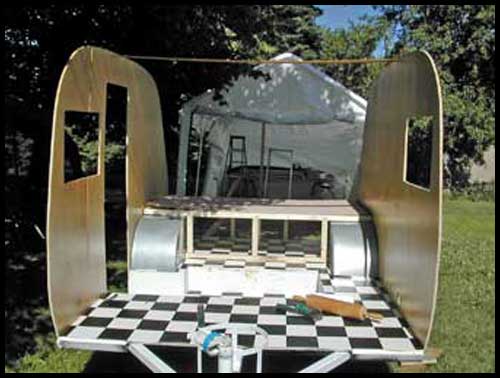
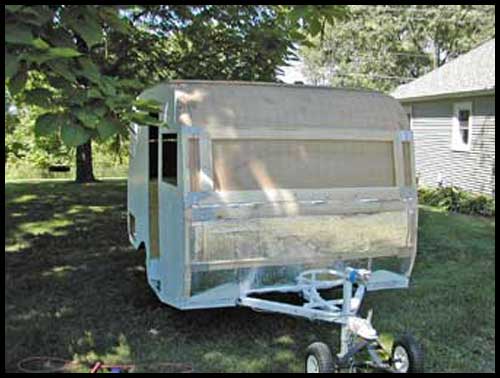
Ready for the back skin. I used a solid board across where the taillights will be.
TekFoiled the sides too.
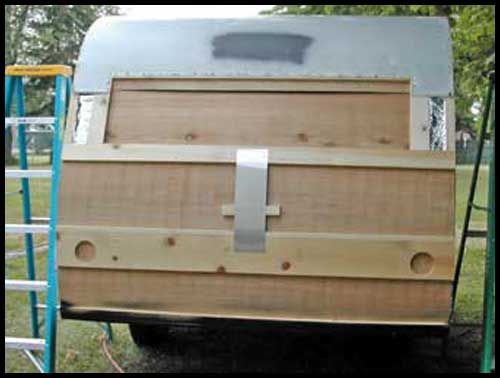
A better view of how I chose to do my back end.
It will weigh more when I'm done, but it will also be a lot sturdier and I think the extra weight worth it! This Scotty weighed in a 940 pounds before I started. I'll get her weighed again when I'm done.
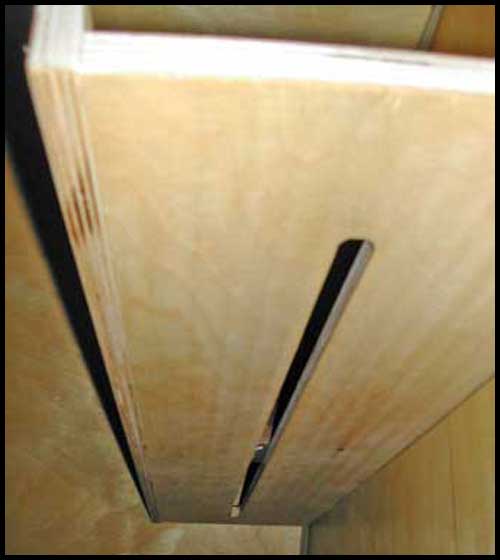
The new bookshelf. I routed a slot to hold a sliding bookend.
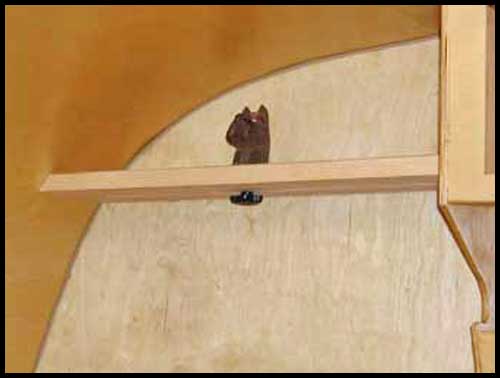
The vintage Scotty bookend, slightly modified. I screwed a hole in the bottom and affixed a bolt. That goes through the slot and a turn handle will allow me to
lock it down to hold the books firmly against the cabinet.
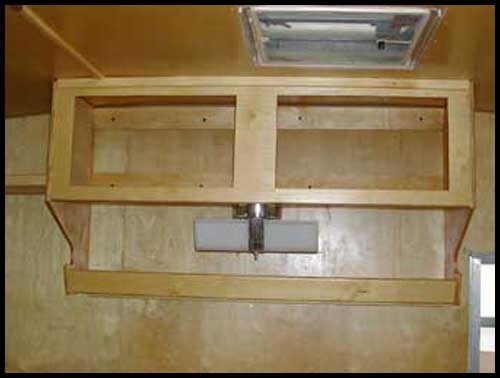
My new upper kitchenette cabinet.
The sides are cut to mimic the wheelwell cutouts and I allowed more space
between the bottom of the cabinet and the open shelf to hold my cannisters.
The very cool Art Deco light fixture was found on Ebay (of course!).
My new dinette seat. I traced a vintage Scotty cookie cutter, scanned it,
blew it up a bit larger in Photoshop and then printed it. Cut it out of the
1/2" birch end and then faced it with a piece of quilted walnut.
The front cabinet with doors attached. I found very 1950s looking hardware--the
look I am going for in this Scotty--1950s!
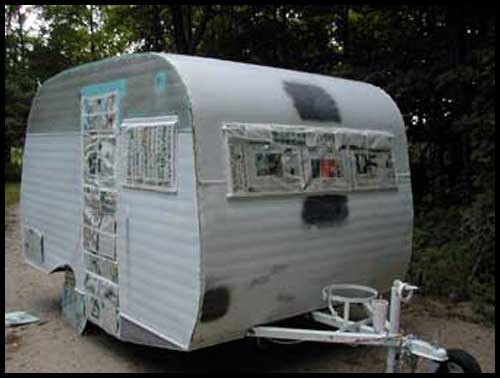
Ready to paint.

Painted! I painted the entire Scotty white first.
The back side painted.
She got tucked away in my Dad's barn each night after painting.
And the purple!

All covered up and waiting for Spring!

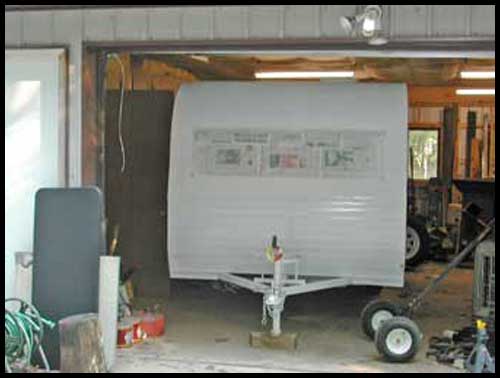
Nothing happened in 2006, except for the building of a "Scottyport"

Scotty 2 is too tall to fit into my non-standard garage unless I let most of the air
out of her tires. This will work much better.
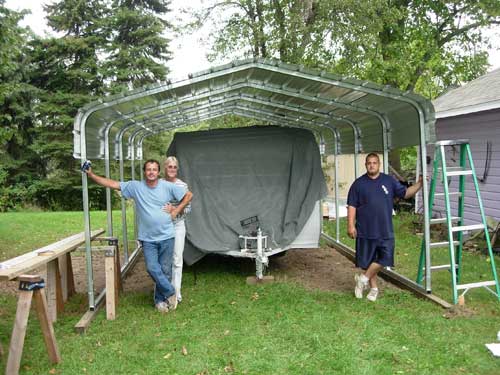
Finished, and Scotty 2 moved into it - still undercover
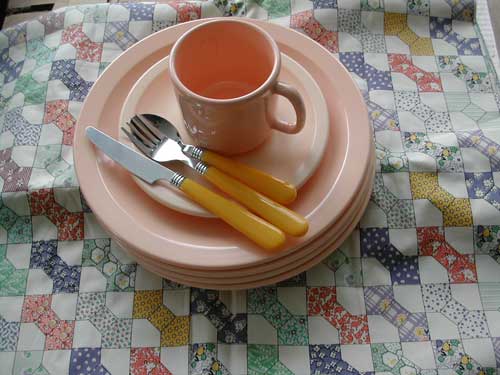
Dishes and the curtain fabric I already had and chose to use. Sure looks 1950ish to me

2007 and Mabel is raring to get back to work on this Scotty!
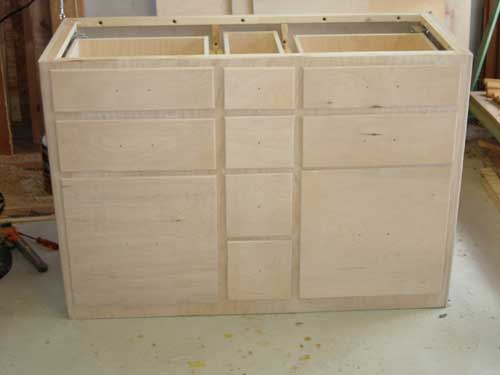
I built the kitchenette cabinet but since my dad's shop was heated,
and mine wasn't, I asked him to make the drawers for me.
I had by then opted to not install a sink, stove, or icebox.
The bottom left "drawer" is a fake - the wheel well is behind there, no drawer.
He did really nice work!
I had him build the two drawers that will go beneath the bed too!
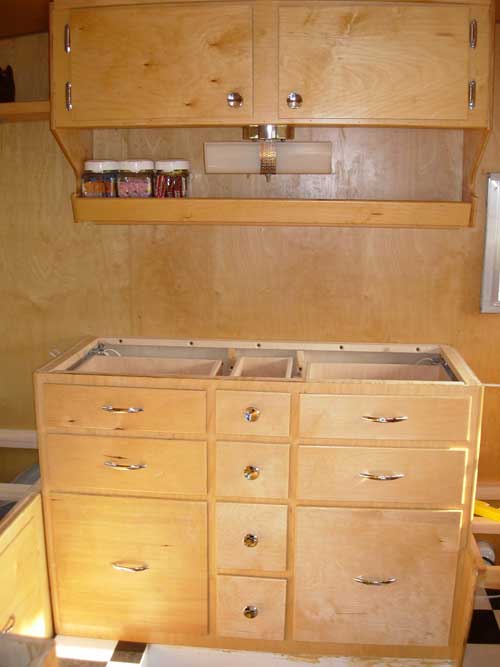
Finished, new hardware added, and installed!

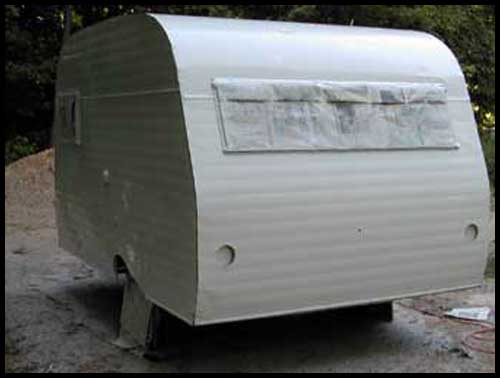
Close-up of one of the coax covers - not putting coax in her,
just covering up former plumbing
holes!
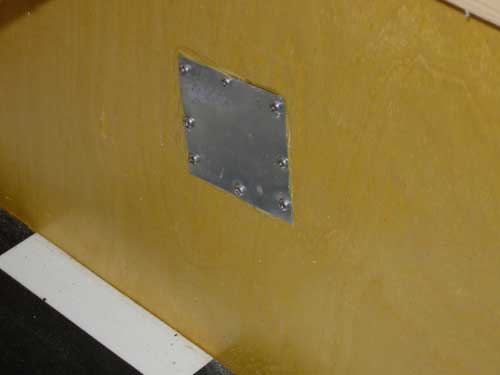
Inside of the water filler hole - piece of aluminum flashing,
sealed with RV sealant and ss screwed on
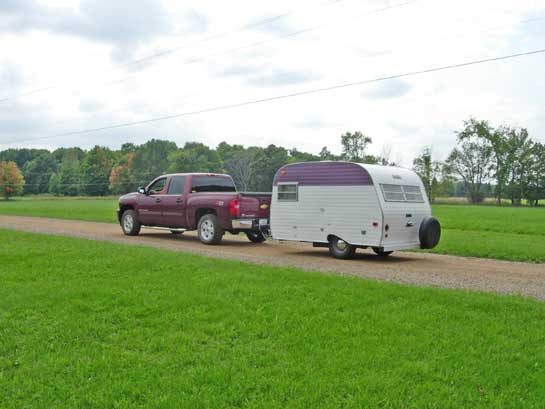
Cleaned up and new reproduction decals added
From the back - bumper is on, new taillights and marker lights installed
Spare tire mounted and new "Life is Good" cover!
(this cover was stolen on the way home from her first Rally
in the Cabella's parking lot - replaced with a standard black one)
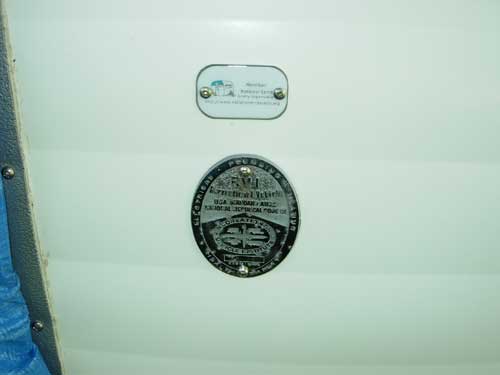
Polished up the RV assocation tag and the new NSSO membership tag
Look - those marker lights are lit! She's jacked way up so I could remove
the tires (having new ones installed) also finish screwing the trim below the door,
and run a new wiring harness for the outside running lights.
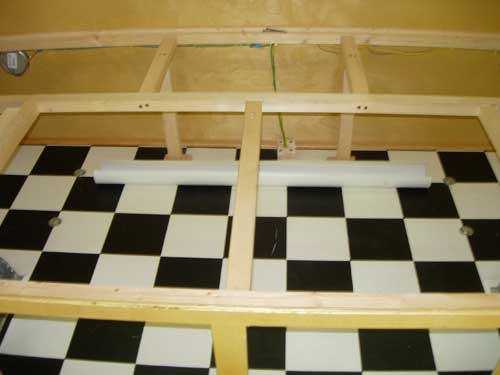
Under the bed - running lights all wired. I ran them through a block screwed to the floor just to protect the wiring from anything rattling around back there. The white thing in front of the wiring is a piece of 4" PVC pipe. I cut the top off and will put my awning poles in there. My theory being it will keep them from rolling all over.
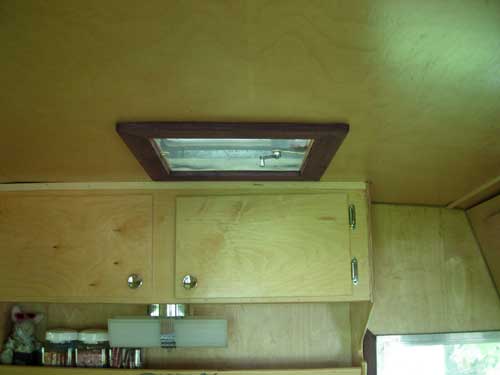
I used solid walnut, finished in a dark mahogany to frame
the new roof vent.
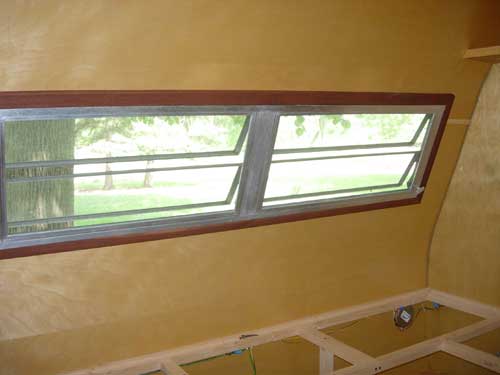
And, framed the windows and door in solid walnut. I like the contrast.
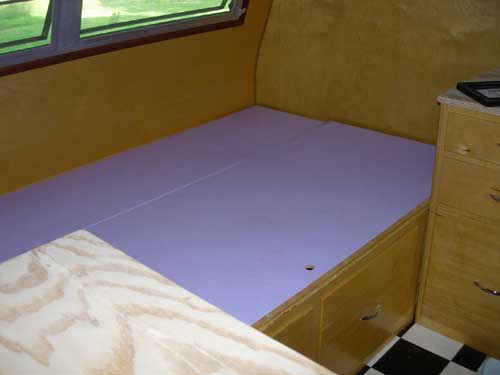
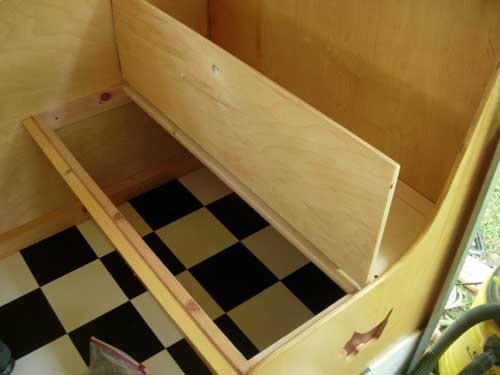
Underbed drawers are installed and the bed storage is ready to be installed.
There will be a 6' hinge between the two pieces.

Two new ST205-75-15 tires
$118.70 mounted, balanced and out the door at Belle Tire
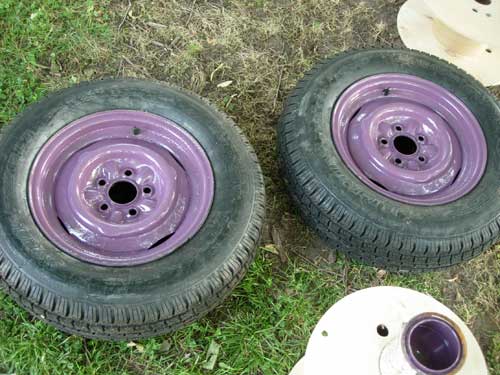
Fresh coat of purple paint
Boy will they look great with the shiny new baby moon 'caps
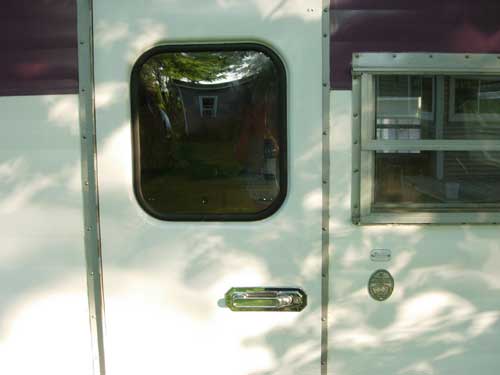
The door window is installed with new gasket!
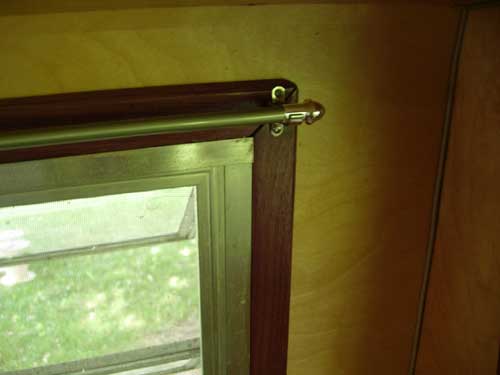
New curtain rods installed. I found some nickle-plated ones
(they only
look green in this pictures) with shiny ends that match the cabinet
hardware

Two 30" hinges on the under-bed lid
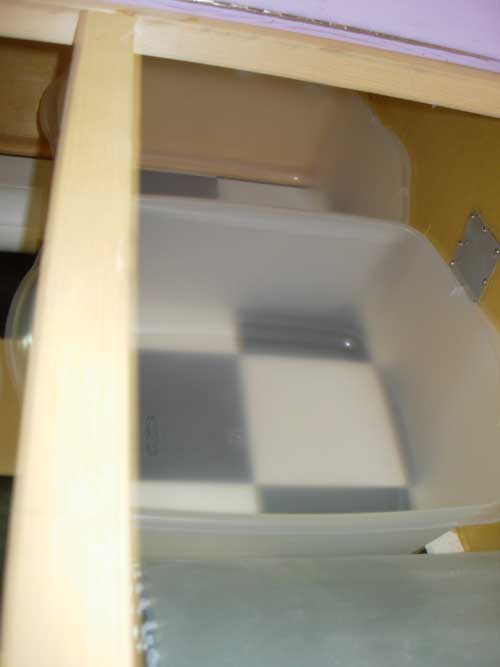
I'm all about organization!
Two "dish pans" from Walmart fit perfectly in that space
and will keep things from rolling around
The dinette seat lids are done

and hinged with 30" hinges
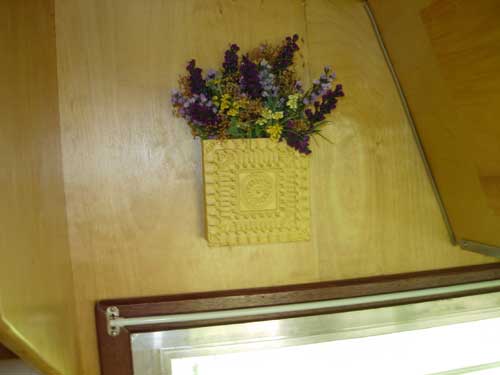
Some of my decor!
Little metal hanging basket from Shipshewana and our local
florist did a custom bouquet for me - purples and yellows!
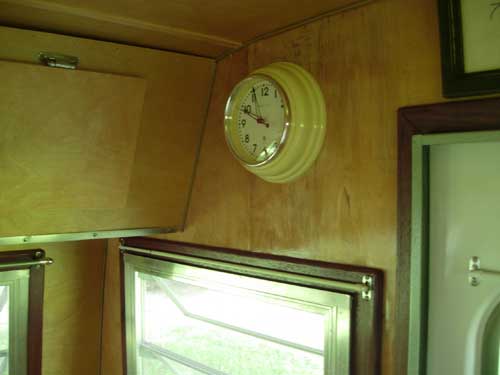
And the retro yellow clock
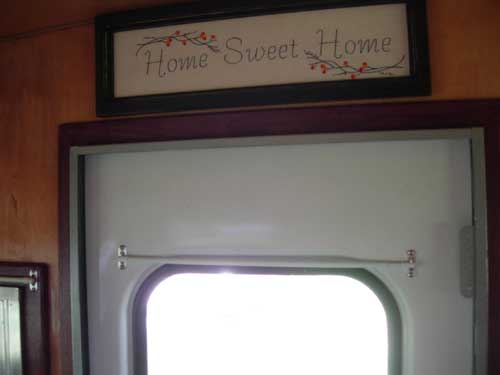
Home Sweet Home!
Curtain rodded the door too since I put plexiglass in there

Breaker box installed with two breakers for two circuits.
Not a fun thing to do - very cramped space and very small box,
but worth it to have three new outlets.

How I connected the ground wire from the breaker box.

This is
the lamp that I made out of the other Scotty bookend
that I didn't
use above (bookshelf)

And, new cushions in place!
Can't tell by the picture, but that is purple mattress ticking fabric.
We opted to not use cushions for the back. We don't plan on anyone
sleeping
in our dinette and we think, for sitting, it is more comfy without
them.
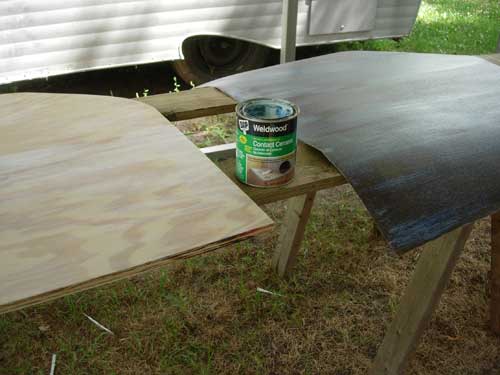
Finally got around to putting plastic laminate on the plywood parts
I'd had cut out for so long. Boy have they ever improved contact
cement
since the last time I used it, when I rebuilt my kitchen!
Paint both the laminate and the plywood and wait about 30 minutes to
dry.
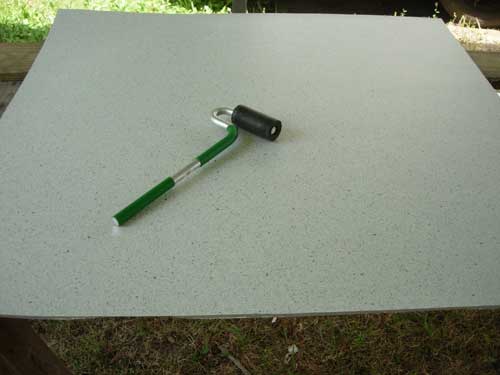
Carefully put them together - make sure you have a bit of an overlap.
A "J-roller" helps a lot - start in the middle and roll it out to
each side -
pay particular attention to the edges
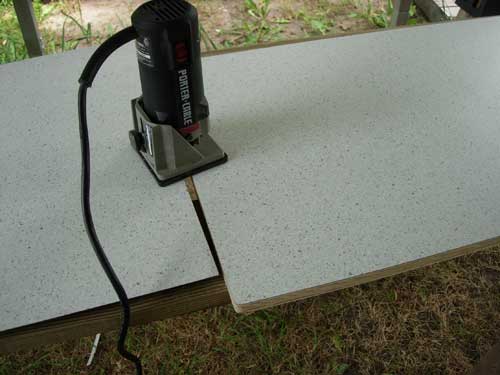
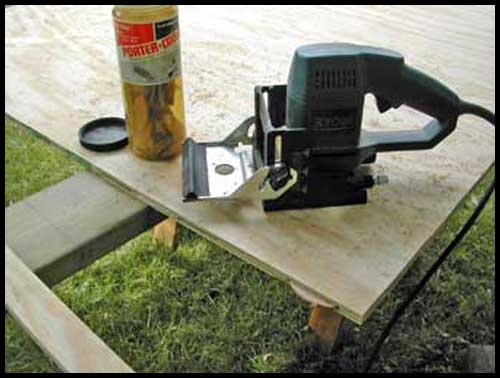
The Porter Cable laminate trimmer router is the best thing since sliced
bread.
Really - it is. Use a small straight bit with a bearing on the end.
The
bearing runs along the plywood and trims the laminate off perfectly.
It made easy work out of trimming the excess from this oddly shaped
tabletop!

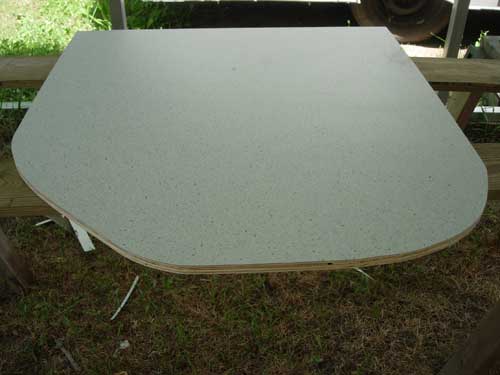
The finished product, installed with the very 1950 looking aluminum
edge trim.
I bought this trim at Bontragers Surplus in White Pigeon - have them
linked
on the site.
And my other cabinet finished!
My new custom "mattress cover" from Knox Foam.
I used a piece of 4" thick extra firm foam and a 2" thick memory
foam.
The custom cover, which has a zipper running the long side and
around each
end at least 15", allowed me to put the foams together into a mattress.
Works well and VERY comfy! I bought my foam on Ebay.

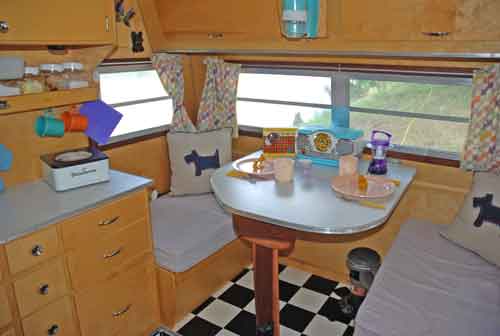
And, the made up bed - ready to camp!
New curtains are done!
I did them as reversible - retro yellow Scotty dogs on one side...
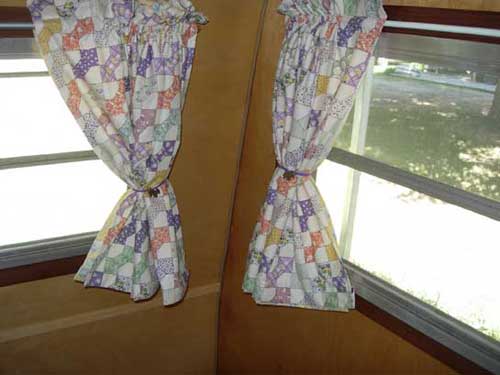
And this print, with lots of purple, on the inside.
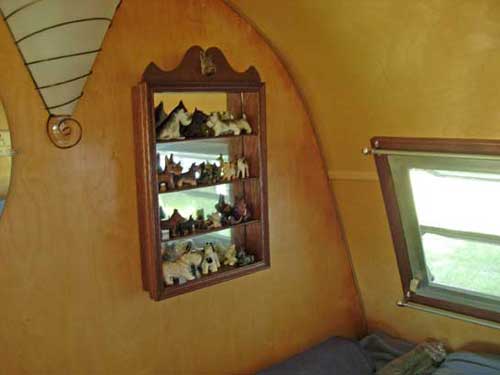
The vintage Scotty dog display case with my vintage Scotty dog
collection. Each dog is affixed with RV sealant so they stay
put!
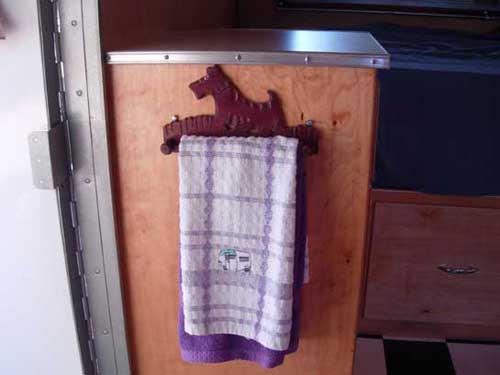
The vintage Scotty dog towel holder with the purple
embroidered towel from It's My Bag
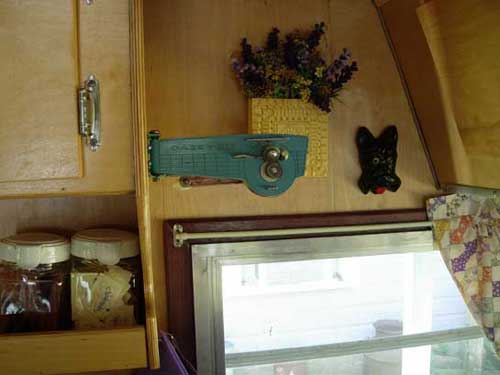
And, the vintage turquoise can opener!
She's DONE!
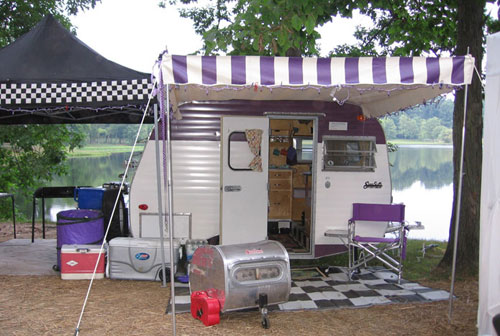
Maiden Voyage
2007 Scotty National Rally in Slippery Rock, PA


September 7, 2009
Mabel and new owner Brad Gibson
Sadie Belle - heading to Auburn, IN

Bye Bye Sadie Belle - it was fun!
|
